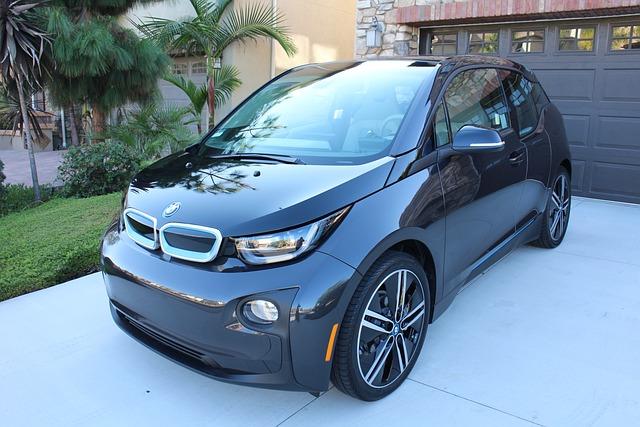
If you're a new Tesla owner or are considering switching to electric, one of the most important decisions you’ll need to make is how to charge your vehicle. While Tesla Supercharger stations are great for long trips, having a Tesla charger installed at home provides unparalleled convenience, allowing you to charge overnight and start each day with a full battery.
Installing a Tesla charger at home isn’t too complicated, but there are a few important considerations to ensure everything runs smoothly. Whether you’re opting for the Tesla Wall Connector or the standard Mobile Connector, understanding the installation process, choosing the right location, and hiring a professional electrician are essential steps.
Here’s a complete, step-by-step guide to help you install a Tesla charger at home with ease.
Step 1: Choose Your Charging Option
Tesla offers a couple of different charging solutions for home use. Understanding which one is best for your needs will help streamline the process.
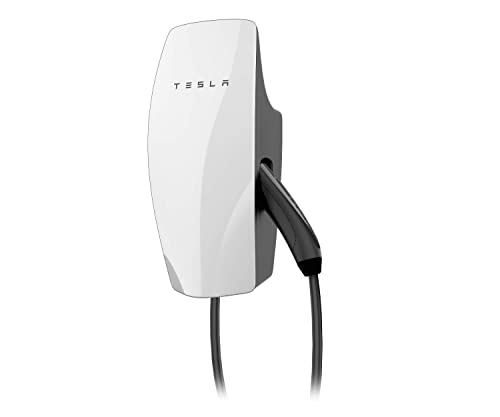
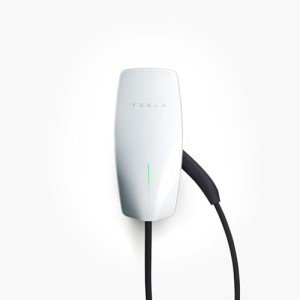
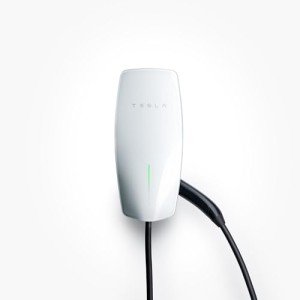
Tesla Wall Connector (Level 2 Charging)
The Tesla Wall Connector is the fastest and most efficient charging option for home use. It uses a 240V outlet (compared to the standard 120V outlet in most homes) and can add up to 44 miles of range per hour of charging. This makes it perfect for daily use, especially if you have a long commute or frequently take your Tesla on long trips.
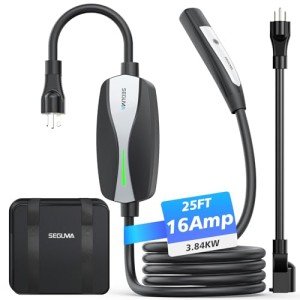
Mobile Connector (Level 1 Charging)
The Tesla Mobile Connector comes with your vehicle and can be plugged into any standard 120V outlet. While this is great for emergency or overnight charging, it's much slower than the Wall Connector, typically adding only 3-4 miles of range per hour. It’s best suited for light, occasional use.
For the best charging experience at home, we recommend installing the Tesla Wall Connector. It offers the best speed, reliability, and convenience for most Tesla owners.
Step 2: Assess Your Electrical System
Before diving into installation, take a moment to assess your home’s electrical capacity. The Tesla Wall Connector requires a 240V power supply, and you’ll need a dedicated 50-amp circuit breaker for safety and efficiency. Here’s what you should check:
- Circuit Breaker and Panel Capacity: Your electrical panel needs to have enough space to accommodate a new circuit for the Wall Connector. If your panel is outdated or lacks the space for an additional breaker, you may need to upgrade it.
- Power Supply: Ensure that your home’s electrical system can handle the additional load, especially if you plan to charge your Tesla frequently or have other high-power appliances.
For safety and accuracy, we recommend contacting a licensed electrician to assess and potentially upgrade your electrical system.
Step 3: Choose the Right Location for Installation
Where you place the Tesla charger in your home will affect how easy and efficient it is to use. Here are key factors to consider:
- Close to Your Parking Area: Ideally, you want the charger to be near where you park your Tesla, such as in your garage or driveway. This minimizes the need for long extension cords and ensures your car is easily accessible.
- Indoor vs. Outdoor Installation: The Tesla Wall Connector can be installed both indoors and outdoors, but if you’re planning an outdoor installation, make sure it’s in a location that’s well protected from the elements.
- Cable Accessibility: Ensure there’s enough space for the charging cable to reach the vehicle’s charging port comfortably. It should be easy to plug in and remove the cable without any obstructions.
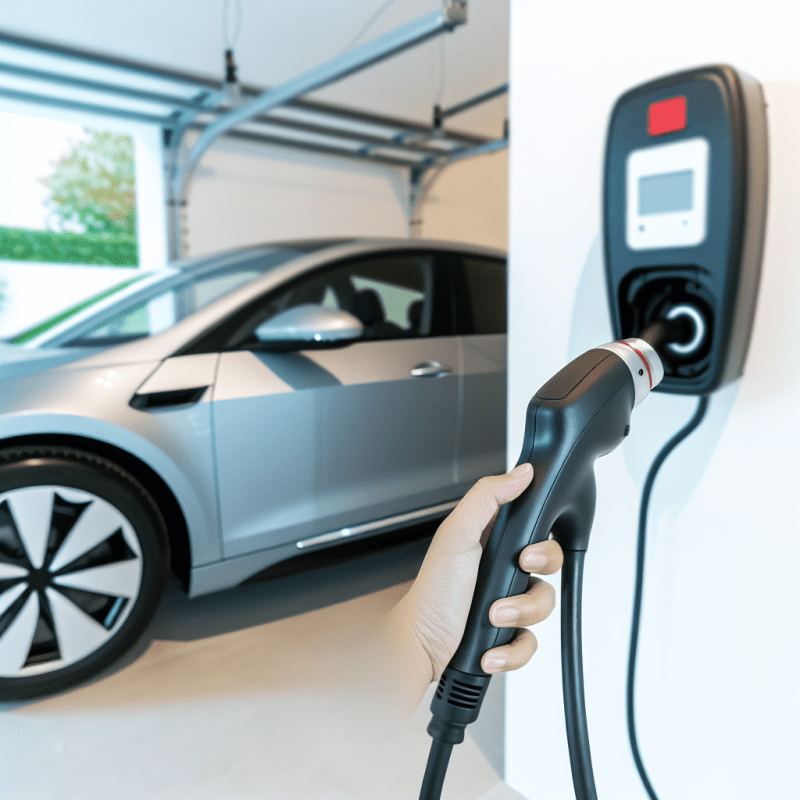
Step 4: Hire a Licensed Electrician
While installing a Tesla charger might seem like a simple DIY project, it involves working with high-voltage electrical systems, which can be dangerous if done incorrectly. A licensed electrician will ensure that your installation is compliant with local codes and that everything is safely connected.
Here’s what the electrician will do:
- Run electrical wiring from your electrical panel to the charging location.
- Install a 50-amp circuit breaker dedicated to the Wall Connector.
- Mount the Tesla Wall Connector on the wall, ensuring it’s securely attached and easily accessible.
- Check all connections and ensure the system is safe and fully functional.
Hiring a professional also ensures that your installation meets Tesla’s specifications and safety standards, avoiding any risk of faulty wiring or electrical hazards.
Step 5: Installation of the Tesla Wall Connector
Once your electrician is on the job, they will follow these basic steps to complete the installation:
- Mount the Wall Connector: The Wall Connector needs to be securely attached to a wall. It’s typically mounted at a height where it’s easy to access the charging port of your car.
- Wiring: The electrician will run the necessary electrical wiring from the panel to the Wall Connector, using the appropriate gauge wire for safety.
- Circuit Breaker: The 50-amp breaker will be installed in the electrical panel to safely power the charger.
- Testing: Once everything is connected, the electrician will test the system to ensure it’s functioning properly, with no errors or electrical issues.
Step 6: Set Up and Configure the Wall Connector
After installation, the next step is to set up and configure the Tesla Wall Connector. This will allow you to monitor and control charging through the Tesla mobile app:
- Connect to Wi-Fi: Using the Tesla mobile app, you can link your Wall Connector to your home Wi-Fi network. This gives you remote control and allows you to monitor charging status, energy usage, and more.
- Customize Settings: You can set charging schedules based on your preferences. For example, you can schedule the charging to occur during off-peak hours when electricity rates are lower.
Step 7: Start Charging
With everything installed and configured, you’re now ready to charge your Tesla at home. Simply plug the charging cable into your car’s charging port, and it will begin charging. The Tesla mobile app will show you the charging status, the estimated time to a full charge, and the cost of energy used (if you have a smart meter installed).
Tips for Ongoing Maintenance and Safety
- Check for Wear and Tear: Periodically inspect your Tesla Wall Connector and charging cables for signs of damage, wear, or corrosion, especially if you’re using it outdoors.
- Keep the Area Clear: Ensure the charging area is free of obstacles to make it easier to plug and unplug your vehicle.
- Contact Support for Issues: If you notice any irregularities or issues with the charger, contact Tesla support or your electrician for assistance.
Conclusion
Installing a Tesla charger at home is a straightforward process that can significantly enhance the convenience of owning a Tesla. With the Tesla Wall Connector, you’ll enjoy faster charging speeds, and with the help of a licensed electrician, you can ensure a safe and efficient installation.
By following these steps and considering key factors like electrical capacity, location, and safety, you’ll be able to enjoy the benefits of home charging—making every day with your Tesla a little bit easier and more enjoyable.